


Whether you're a plant-obsessed newbie or already have a growing number of plants taking over your home, this Plant Puzzle Jungle Terrarium is the perfect gift!
My Instagram feed has been full of quirky and beautiful terrariums, recently and these self-containing eco-systems have been capturing the imagination of many - in fact, terrariums have been cropping up in several bestseller gift guides lately.
I decided to give myself an early Christmas present and purchased this Plant Puzzle Jungle Terrarium in the Bloombox Club Black Friday sale last month. Not only was it a much more affordable option than several other DIY terrariums that I was looking at, but it came with a light which I thought looked pretty cool.
Upon opening the box, I found a very handy and easy-to-follow instruction guide so this is ideal for beginners and kids alike.

- A large recycled Glass Terrarium with lid and light
- Three different Baby Plants
- White Stone Gravel
- Active Charcoal
- Soil
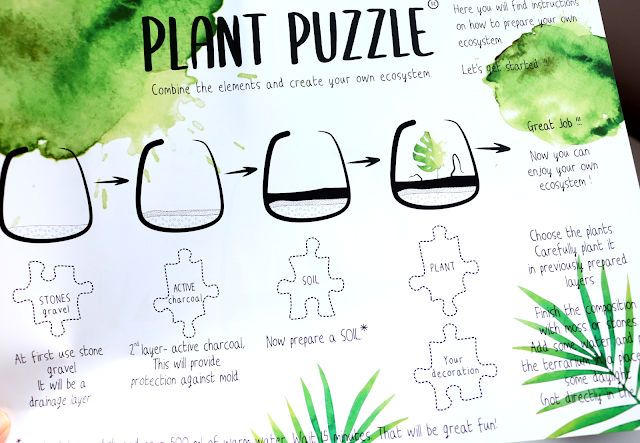
Putting it together couldn't be easier, but here's a quick step-by-step guide to show you what I did.
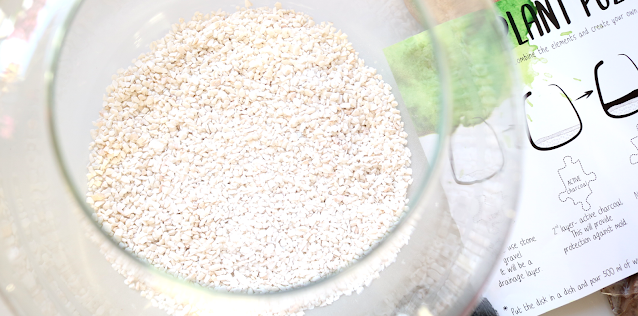
Step One: Add The White Stone Gravel
As closed terrariums are classed as self-containing eco-systems, it's important that your very first layer is a decent quantity of stone gravel. This acts as a drainage layer to help the terrarium maintain the right level of humidity and to stop the roots of the plants inside from rotting.
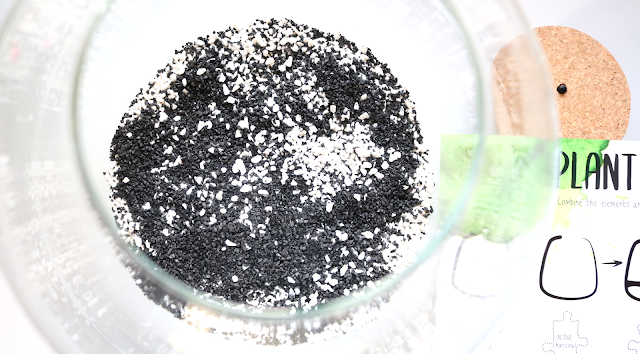
Step Two: Add Active Charcoal
Equally important is a layer of active charcoal which helps to stop mold from forming in your terrarium. Nobody likes mold! This is added on top of the stone gravel.
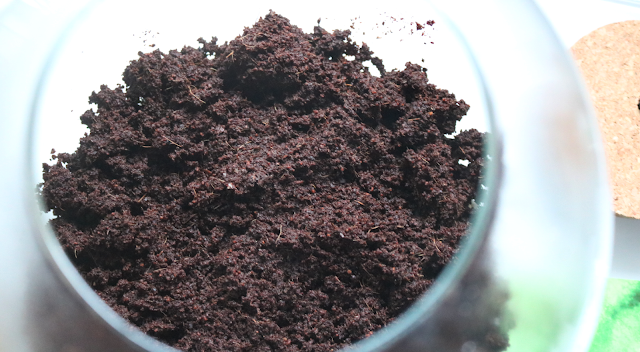
Inside the box, there are two disks of soil. To get them ready for your terrarium, simply put each disk into their own large bowls, and pour 500ml of warm (not boiling) water over each one. Allow the water to soak into the disks and after around 15 minutes, the disks will have turned into regular-looking soil. I'd recommend waiting a further 30 minutes or so for the soil to cool down before adding it to your terrarium so you can control the temperature better.

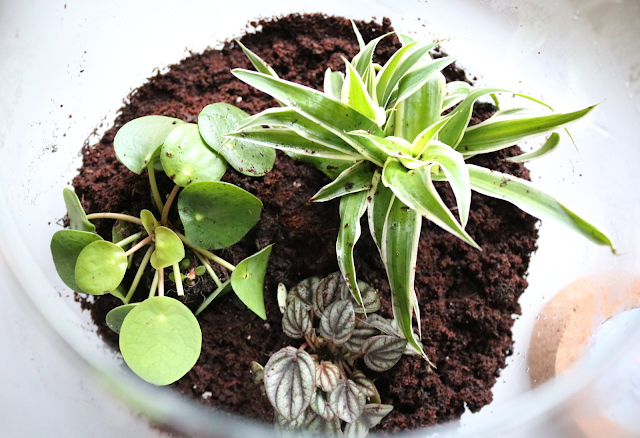
Step Four: Add The Plants
Now it's time to add the plants! Very carefully remove your plants from their nursery pots and plant them one by one, into the soil in the terrarium. This took a little longer than I was anticipating and it's recommended that you try to space them out so they have room to grow and that they aren't touching the glass, so go for a more central placing.
The baby plants in my terrarium are (from top clockwise) Pilea (aka Chinese Money Plant), Spider Plant, and Peperomia.
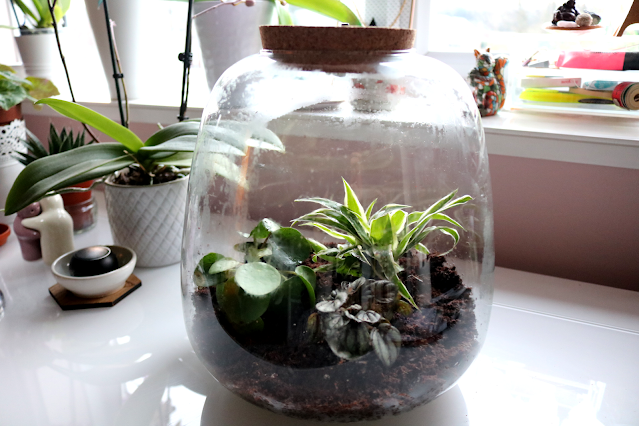
The finished terrarium!
And there you have it, a super easy little ecosystem that you don't really need to do much maintenance with. Place it in an area that gets a lot of natural light, but not in direct sunlight as this will heat the inside of the terrarium up too much. Every so often, you can take the lid off and let some fresh air circulate for an hour, before closing it up again - this will further help to prevent any future mold issues.
Watering?
You don't need to water a terrarium unless you start to see the soil look dry, and even then, water very sparingly. The humidity in the terrarium will keep the plants happily hydrated, so there's not much else to do other than enjoy its beauty.

Are you a fan of terrariums and closed eco-systems?


Post a Comment
Thank you for your comment! For a faster reply you can tweet me @beautywolfgirl