Showing posts with label nail art. Show all posts

NOTD: DinkiBelle Nail Wraps in Spring Blossom review

Saturday, 23 April 2016

DinkiBelle Nail Wraps in Spring Blossom review
Every now and then, I like to dabble in nail wraps, mainly because I'm rubbish at doing any kind of nail art myself and wraps are just so much easier and less time consuming to apply.

Celebration Time: Christmas Eve Party Accessories + Reader Discount Code!

Monday, 21 December 2015

Christmas Eve Party Accessories
Ready to let your hair down on Christmas Eve? Whether you'll be with friends or family (or both!), here are some must-have party accessories to add a bit of sparkle and bling to your look.

Christmas Gift Guide 2015: Gift Idea for Nail Art Fans from MoYou London

Monday, 14 December 2015

MoYou London review
Nail art is hugely popular as a gift idea and MoYou London have an extensive and varied range of kits and stamping plates to suit everyone's tastes and budgets.

NOTD & Review: Ted Baker That's A Wrap Nail Polish Strips in Black Floral

Monday, 10 March 2014

I've had a busy weekend, so to prep for it, I did my nails bright and early last Friday morning.  As I was going to a new product launch event, a friend's birthday and Crufts, I wanted something eye catching, but not too 'in your face'.

NOTD: Galaxy nails

Friday, 9 September 2011


Photobucket
Photobucket

I love, love, love the Galaxy inspired nails trend at the moment. This is my first attempt and I don't think it looks too bad (though trust me when I say it looks much better from a slight distance!)

Photobucket

For mine I did the following:-
1. Apply one coat all over of a dark navy blue, I used Barry M's 292 Navy which is also one of my all time favourite shades from Barry M.
2. Once that has dried, using a teeny piece of an old (but clean) make-up sponge, I quickly dabbed on a bit of Barry M's 66 Matte White to create a cloud effect.
3. Allow to dry and then do the same with a purple shade, I used Mac's Formidable which looks like a galaxy in a bottle on its own.
4. Lastly, to add some 'stars', you can add some glitter if wanted. I used Barry M's 239 Lavender Hexograms which worked well with the purpleness of Formidable.
5. Slick on a clear top coat and you're done!

NOTD: Velvet Underground/Warhol banana inspired nails

Friday, 22 July 2011

Photobucket


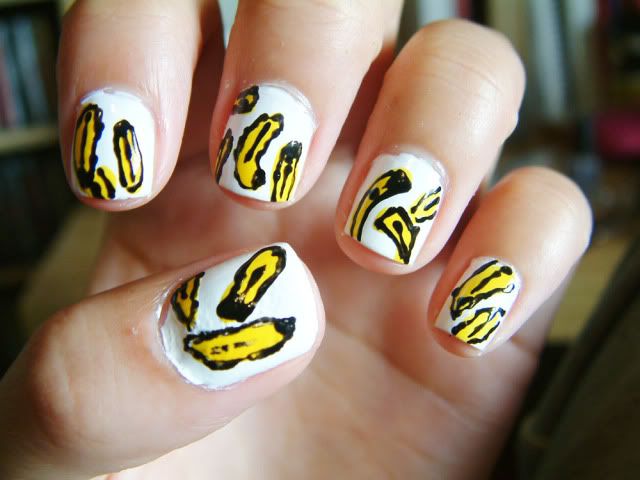
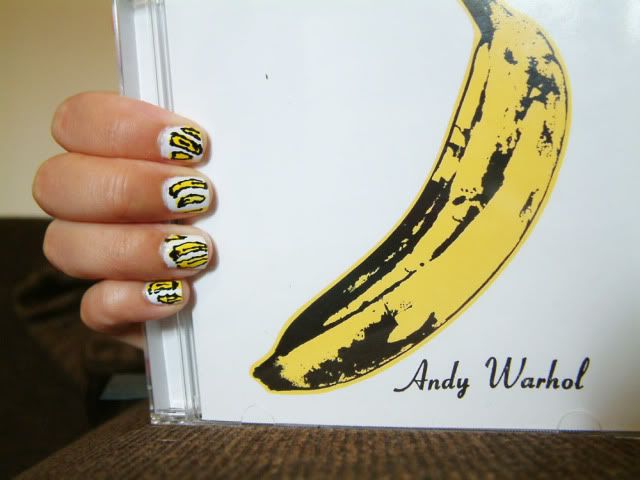
I've been having an epic tidy up this morning and my clean up soundtrack has been courtesy of The Velvet Underground. As a little tribute (and because I was bored), I painted my nails with little Warhol inspired bananas! They're a bit messy and look better from a distance, but I'll probably be changing my nails again for the weekend anyway.
Photobucket


Photobucket

How to:-
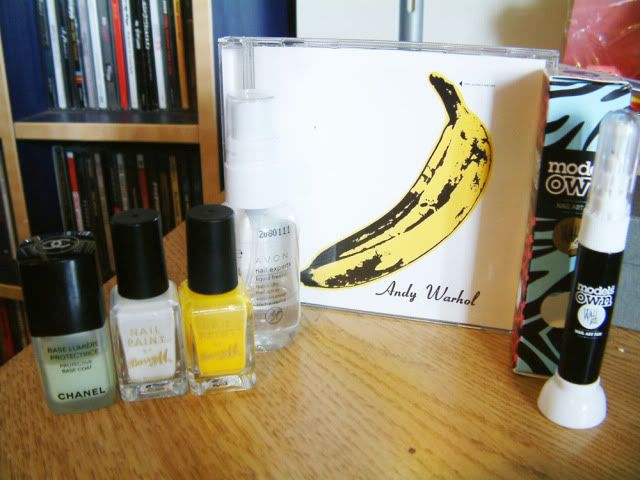
1. Use a basecoat, I used a Chanel one, purely because I'm using it up at the moment.
2. Paint on a white polish, I used two coats of one from Barry M.
3. Once that has dried, paint little banana shapes with a yellow nail polish. Again, I used one from Barry M. You could use a paintbrush if you're more creative and less rushed than I am.
4. Allow to dry and then use either a black eyeliner or a nail art pen (mine's from Models Own) to outline the banana shapes and add a bit of definition.
5. Use a topcoat or spritz on a quick dry spray, the one I used is Avon's Liquid Freeze spray.
6. All done!

NOTD: Leopard nails (Gold & Mushroom)

Wednesday, 20 April 2011

Photobucket

Photobucket

Photobucket

I had a go about playing with my new Models Own/Wah pen today and am pleased with the results! I used Chanel's protective base coat (I bought this on a whim after I'd ran out of my usual Barry M one - I would say it's no better than the BM one so save your pennies) first, then applied two coats of Barry M's Gold (289). Once that had dried, I used Barry M's Mushroom (310) to do the spots and when that was dry, I outlined them with the nail pen. The application of the pen is good, but I had some trouble taking the lid off. To finish, I applied Barry M's 3in1 clear varnish as a topcoat and once that had set, I used Avon's Liquid Freeze Quick Dry Spray to make sure that it wouldn't smudge.

The Liquid freeze spray is good (I have the old style packaging) but it's not the 30 second setting miracle it claims to be. I would say give it at least two minutes to properly set everything and then it's usually 95% smudge proof. I say 95 because if your nail varnish has been applied a little thickly or you have on a few coats, then it might still smudge but nowhere near as horrifically as it might do without it. I had a go about spraying it on after each coat, but it's very messy, oily and laboursome to do so and didn't make much of a difference. Use it as a final setting spray instead.

It's on offer on their website at the mo for £3 (half price) so I might stock up, well worth it at this price.
Previous Post Previous
Powered by Blogger.